ColourSpace can be integrated with madVR HTPC & Envy for accurate Closed Loop display profiling, LUT generation and display calibration.
- ColourSpace INF/XPT/PRO/CAL/LTE & HTX/HTP/HTL
- Manufacturer Specific ColourSpace madVR HTP/HTL
- Closed Loop Profiling
- TPG Operation
- 3D & 1D LUTs
- Native 2563 3D LUT Support (Higher license levels)
- madVR HTPC & Envy
ColourSpace Integration
madVR operation and function is controlled via the Hardware Options menu, accessed via the Profiling window.


Initial Setup
- If using madVR HTPC, open madTPG.exe, which is madVR's Test Patch generator, from the madVR install folder
(If using madTPG over a network check the Windows mad tray icon settings via a right click, and make sure LAN Access is Enabled) - Use a double click on madTPG to make full-screen, with no surround or menu area
- Set the desired ColourSpace set-up options via the Settings menu, as required
(Due to madVR's signal path workflow Patch Scale must be set to Full) - Open a ColourSpace Profiling window, select Hardware Options, and select either madVR HTPC, or madVR Envy from the Hardware drop-down list
- Using the Network Address window enter the required IP address, and select Connect
(You will need to manually enter the madVR PC name or IP address - if on the same PC as ColourSpace this will be localhost) - Select the colour space Slot into which the LUT will be uploaded via the madVR Options menu
(Due to the way madVR works you must use the correct colour space slot) - To make sure there is no existing calibration data active within madVR, select Unity Bypass from the Select LUT option, and press Upload
(With madVR the Disable LUT option in HTPC, and Disable LUTs in Envy, can be used to bypass all image processing. Envy additionally has Reset options for each individual 1D & 3D LUTs, as well as a Reset All option.) - Using Calibration Patches select the desired patch option to use for profiling
(If possible, Auto uses the patch settings defined within the ColourSpace Settings window, or else the closest available patch settings - Custom uses the madVR Options to set patch size)
Note: The keyboard 'O' key can be used within the Manual Measure and Hardware menus to quickly Disable/Enable the TPG
As soon as a Calibration Patches selection is made the output of madTPG will display the patch colour as defined within the ColourSpace Measure and Characterisation menus.
Potentially, when Unity Bypass data is Uploaded all settings will be nullified. Should it be desired that different LUTs and other settings remain as defined, upload the Default Unity LUT, which uploads just the LUT, and does not reset any additional settings. Set necessary settings, such as Brightness/Contrast/Black-Level, before any LUT Upload.
HDR Setup
The madVR HDR Options menu provides a set of controls for HDR displays.
- Via the madVR Options menu Enable HDR tick box enables all the HDR options
- With madVR Envy the Peak Luma (nits) option enables the measured white value to be set manually, or via the > button
- The HDR Info Frame drop-down provides a set of pre-set values for the different colour spaces, as well as a Custom option
(When set to Custom user values can be entered) - The Max/Min DML and Max CLL/FALL values are always user entered
- The Upload Info Frame button uploads the values into madTPG
Profiling Operation
To use madTPG, or madVR Envy, as a Patch Generator with ColourSpace navigate to the desired profiling mode - Manual Measure or Display Characterisation.
The output of madTPG/Envy will mimic the colour displayed, using the patch settings defined via the Hardware Options and Settings menus.
Profiling can then be performed as normal, using the probe connected to ColourSpace, with madTPG displaying the required patches on the display being profiled.
The Disable 3D LUT option can be use to temporarily disable any LUTs.
For madVR HTPC the Disable VCGT Reset can be used to stop any loaded VCGT from being reset before profiling.
LUT Upload
After profiling, a Calibration LUT can be generated as normal within ColourSpace LUT Tools.
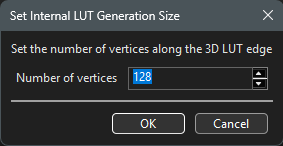
Large LUT Sizes
As madVR uses very large internal LUT sizes, it is extremely beneficial to use a higher ColourSpace license level, with the ability to work with large LUT Generation Sizes.
To benefit from this unique capability of madVR systems higher ColourSpace licenses can natively work with, and upload into madVR 2563 3D LUTs via the madVR Load LUT Size option.
Note: The madVR Load LUT Size option is totally sperate to the LUT Generation Size option available via ColourSpace Preferences.
However, to work with such large 3D LUT sizes requires a decent powered PC, with a decent resource allocation capability. Lower power PCs will not be able to generate or upload 2563 LUTs into madVR.
Note: When working with extremely large LUT sizes do not keep LUTs open in the LUT Generation window while performing LUT Upload.
With the LUT still held within ColourSpace navigate back to the Hardware Options menu, and select the desired LUT from within the Select LUT options, and Upload.
The Temp slot - Temporary - can be used to avoid overwriting any existing LUTs while testing workflows, etc., but the LUT will not be saved through a power/reset cycle.
Additionally, with madVR Envy remember to set the correct Gamma value within the Settings tab to match the generated LUT target colour space value.
With madVR Envy there are three LUT slots, with the 3D only, or or 1D + 3D combination, being the normal configuration to use for display calibration, with the back 1D LUT left empty.
- 1D + 3D
- 1D1 (front)
- 3D
- 1D2 (back)
The back 1D LUT can be used to pre-set a display's greyscale and/or gamma as a first pass, and then the display can be re-profiled with the back 1D LUT active, and the 1D + 3D option used to uploaded final calibration LUTs generated from subsequent profiles made with the back 1D LUT active.
The front 1D LUT can also be generated independently from the 3D LUT, with both being uploaded separately, with the 1D LUT acting as an input, or shaper, LUT for the 3D LUT. As with any 1D +3D LUT combination, the 3D LUT has to be generated and uploaded first, and the display re-profiled with the 3D LUT active, to enable a 1D LUT to be generated and uploaded independently.
When Uploading separate LUTs into madVR Envy the LUT name needs to be consistent when Uploading, to enable the different LUTs to be effectively combined within madVR Envy.
The LUT File Name drop-down will show all available LUTs held within the ColourSpace library, as well as offering a Custom name and Auto name option.
(The LUT File Name drop-down will only become active when Select LUT shows something other then Unity Bypass.)
With madVR HTPC, unless the issue has been fixed by madVR, the LUT will likely need to be rescaled to video range using LUT Adjustment/Scaling/Video Scale.
(Forcing the use of a video range LUT is a madVR limitation.)
Calibration Guides
 3D LUT Calibration
Manual Calibration
3D LUT Calibration
Manual Calibration